


NEM, which stands for New Economy Movement, is cryptocurrency platform written from scratch in Java and JavaScript that features a proof-of-importance (POI) algorithm, the first reputation based blockchain algorithm. Additional features include P2P secure and encrypted messaging system, multi-signature accounts and an Eigentrust++ reputation system.
NEM has recently experienced an amazing surge in price that has placed in the top market capitalization in crypto. However, it is still hard to buy the NEM (XEM) token especially since it is not available in any popular fiat-enabled exchange yet.
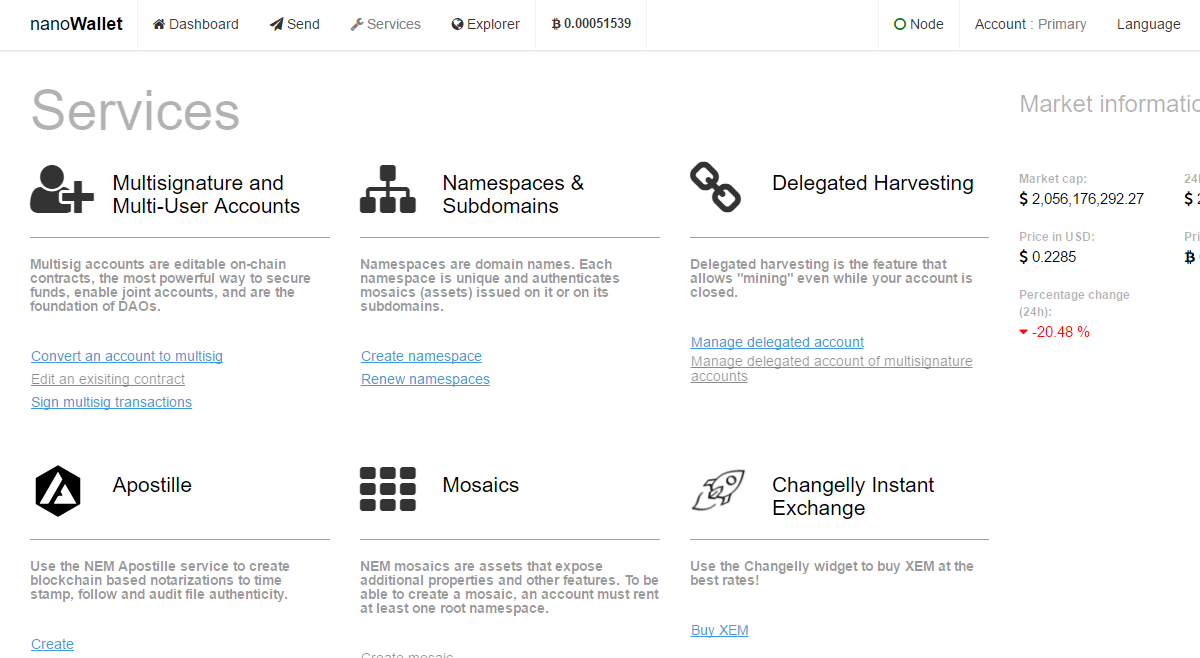
Today, we’re going to teach you how to use the NEM wallet to store and use your XEM tokens. You can also check the "services" tab for additional tools like Multisignature and multi-user accounts, a built-in Changelly exchange and Namespaces and Subdomains.
Part 1 - Download and install the wallet
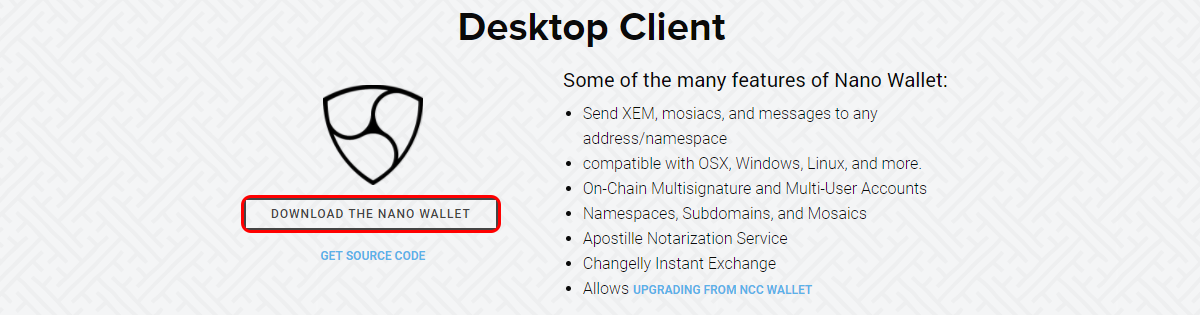
Step 1: Click here to go to the NEM wallet download page
Step 2: Click “Download the Nano Wallet”
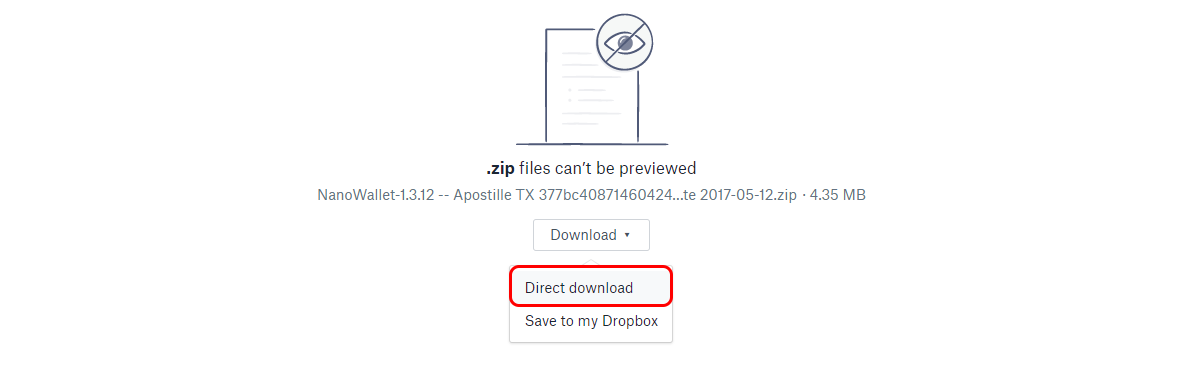
Step 3: Click “Download”

Step 4: Click “Direct Download”
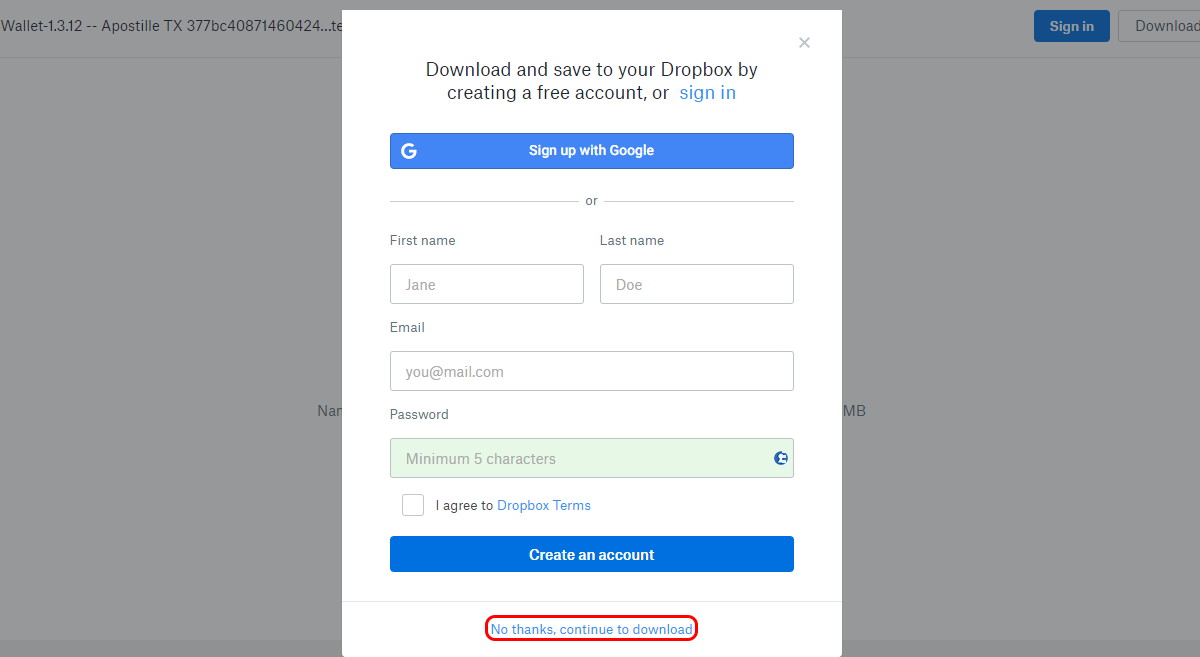
Step 5: Click "No thanks, continue to download"
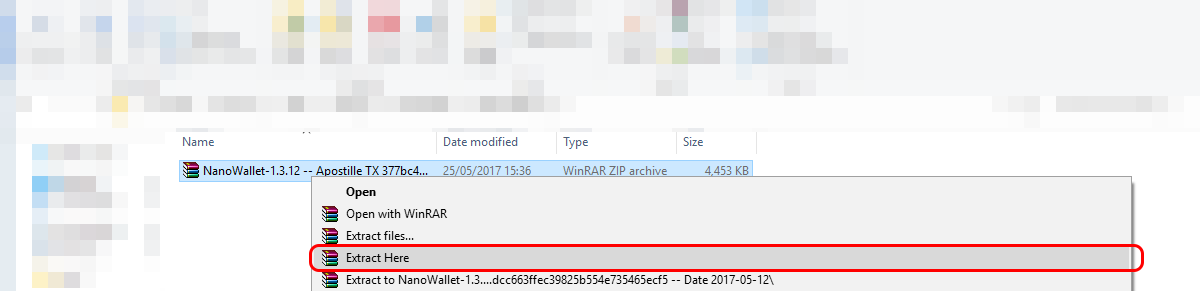
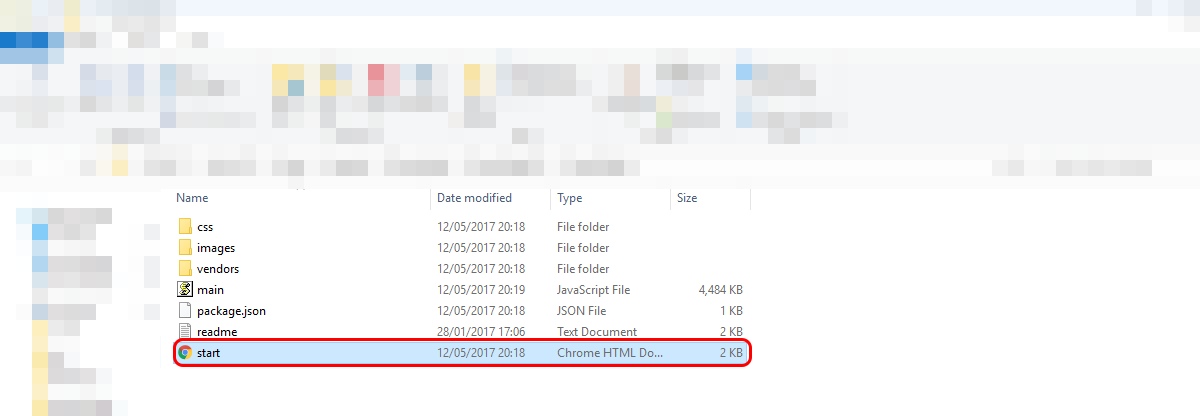
Step 6: Extract the .zip file
Part 2 - Create a wallet
Step 1: In the extracted folder, click “Start.html” which will open the wallet in a browser window
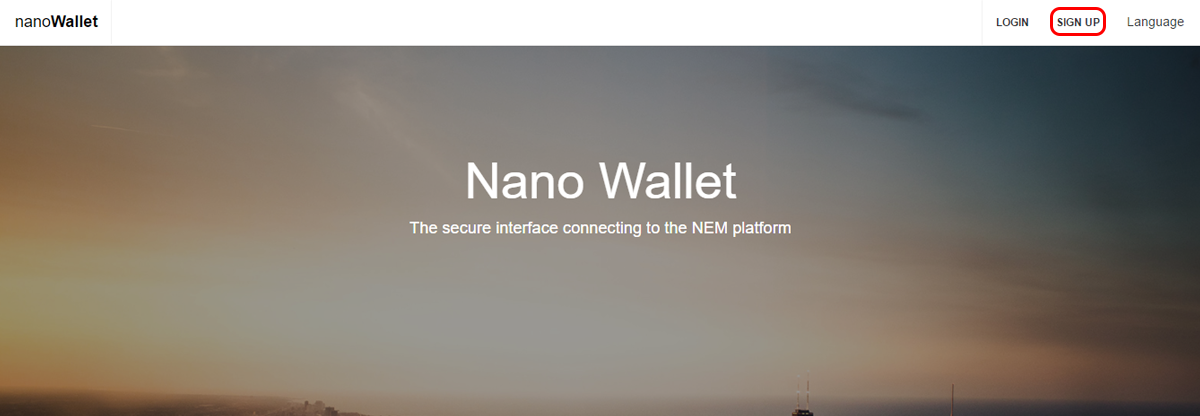
Step 2: Click “Sign up”
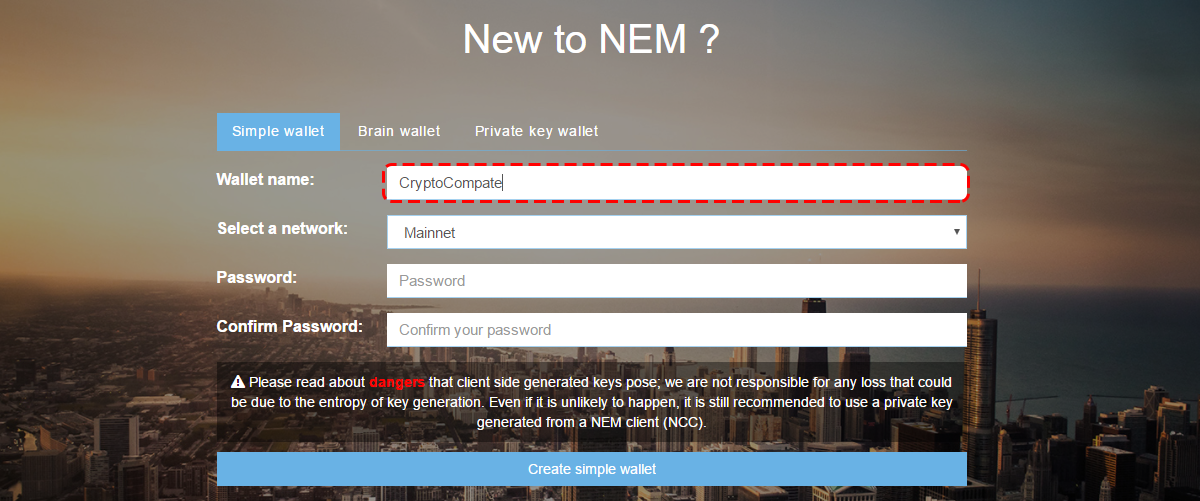
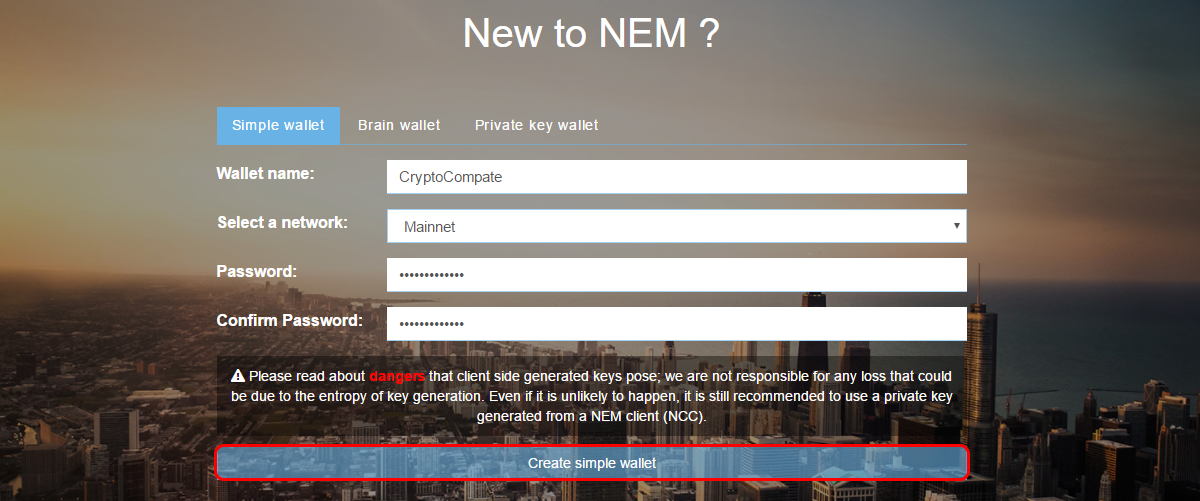
Step 3: Enter your preferred username
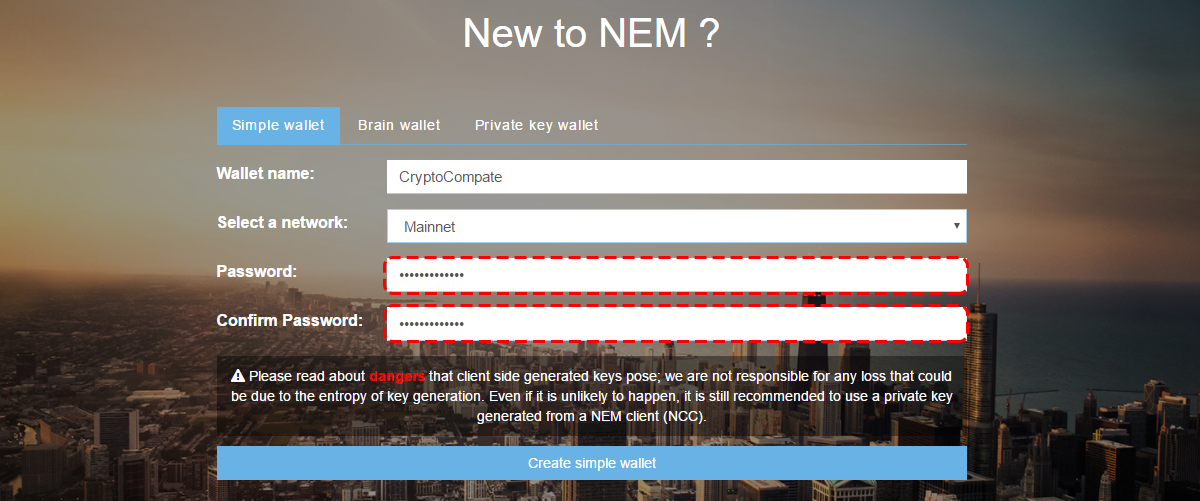
Step 4: Enter the password and confirm it
Step 5: Click “Create Wallet”
Step 6: a wallet file with the same name you chose for the wallet will be downloaded which can be used to backup your wallet. You’ll also need your private key, so click “Show private key”
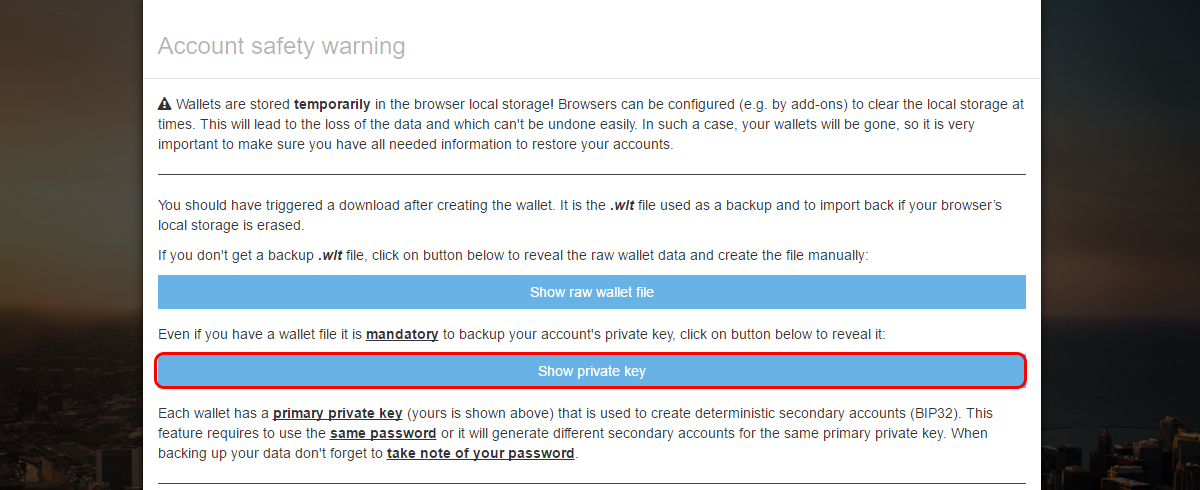
Step 7: Save your private key on a file or piece of paper
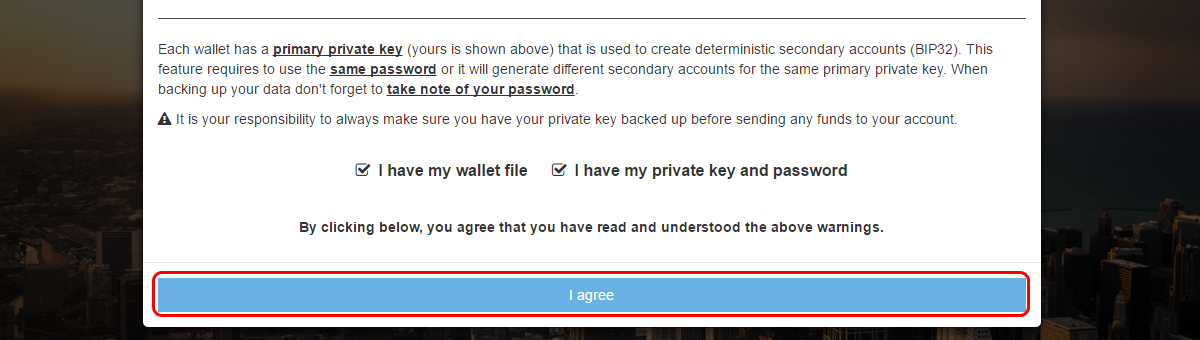
Step 8: Confirm that you have downloaded the .wlt file, private key and password

Step 9: Click “I agree”
Part 3 - Login and Receive XEM
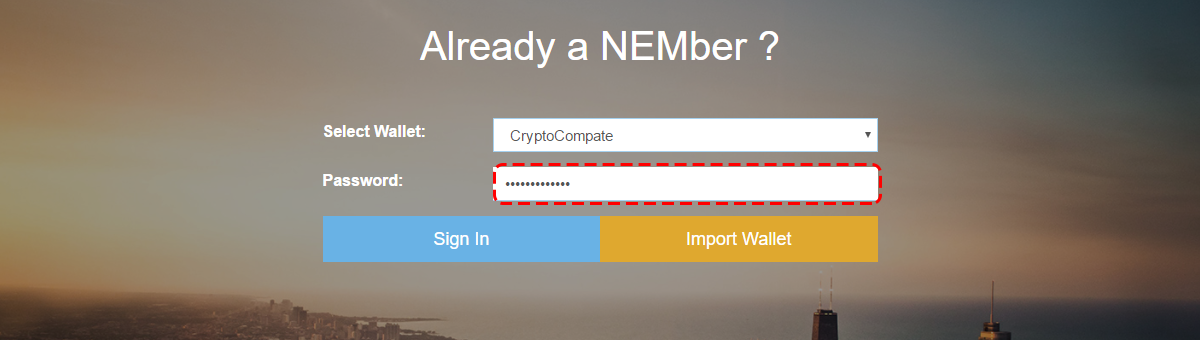
Step 1: Now, we’re going to log in, choose which wallet to use
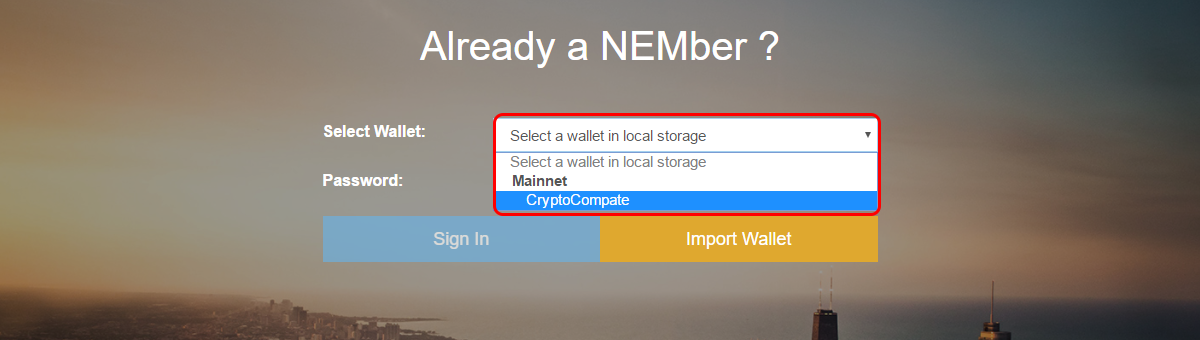
Step 2: Enter your password
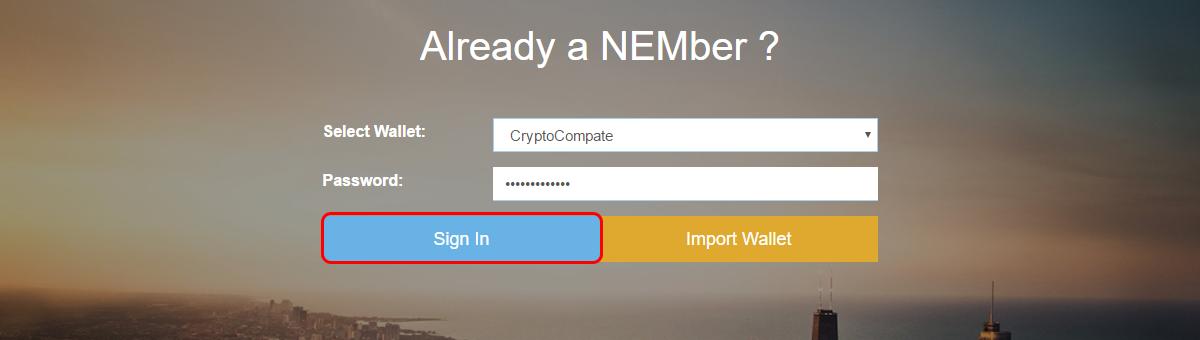
Step 3: Click “Sign in”
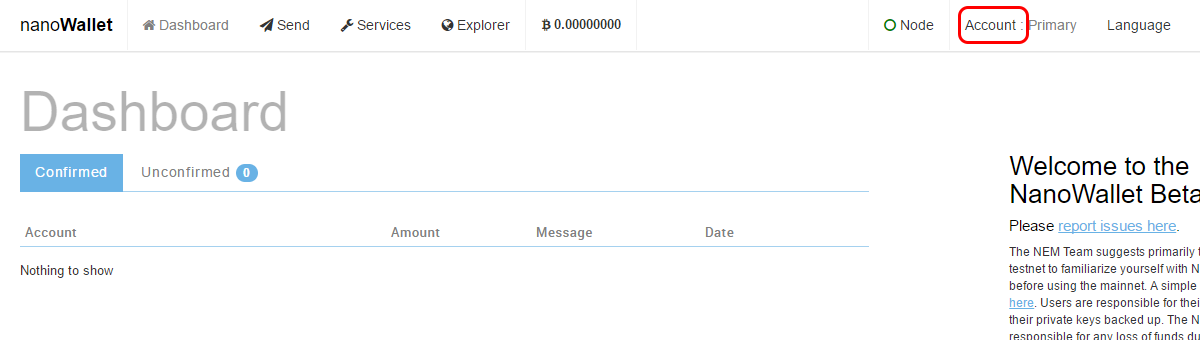
Step 4: To receive payment, click “Account”
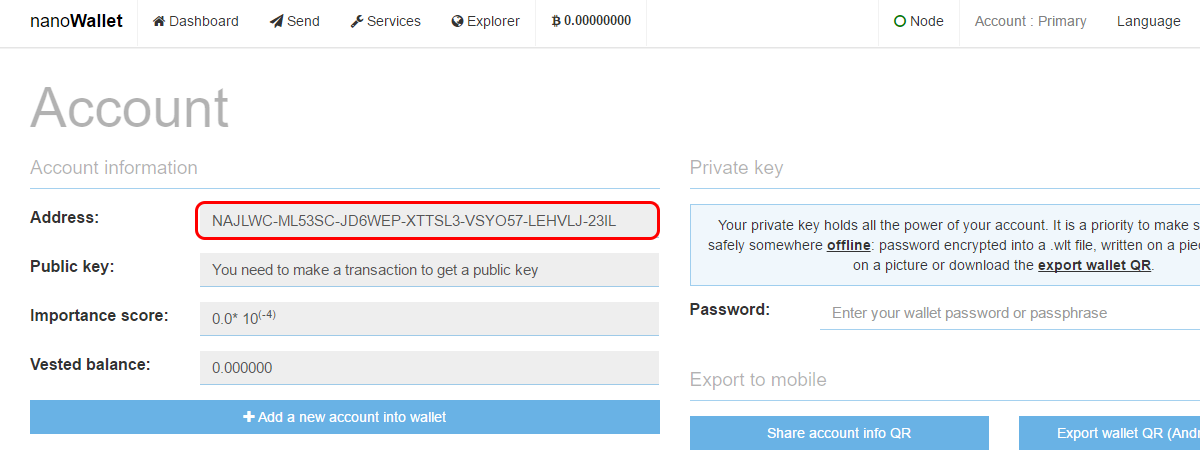
Step 5: And have XEM sent to the address shown. You can give a message as well to identify payments.
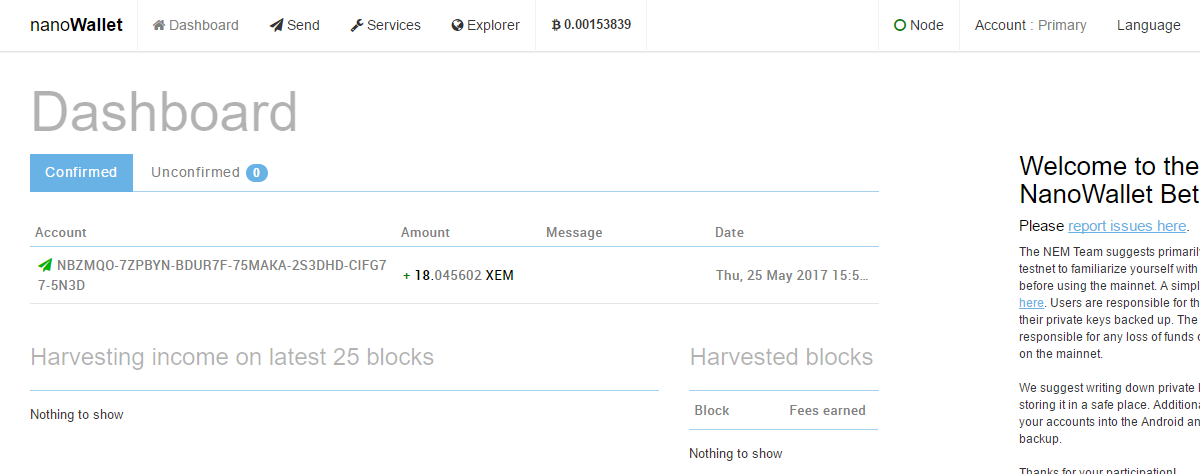
Once the transaction arrives, you’ll see it on the dashboard
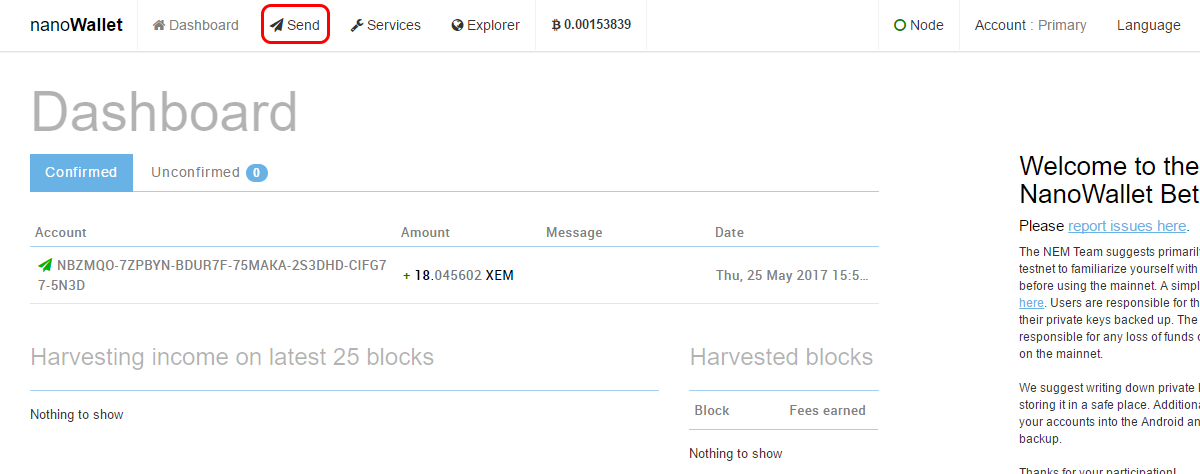
Part 4 - Send XEM
Step 1: Click “Send”
Step 2: Enter the address or alias you’re sending to
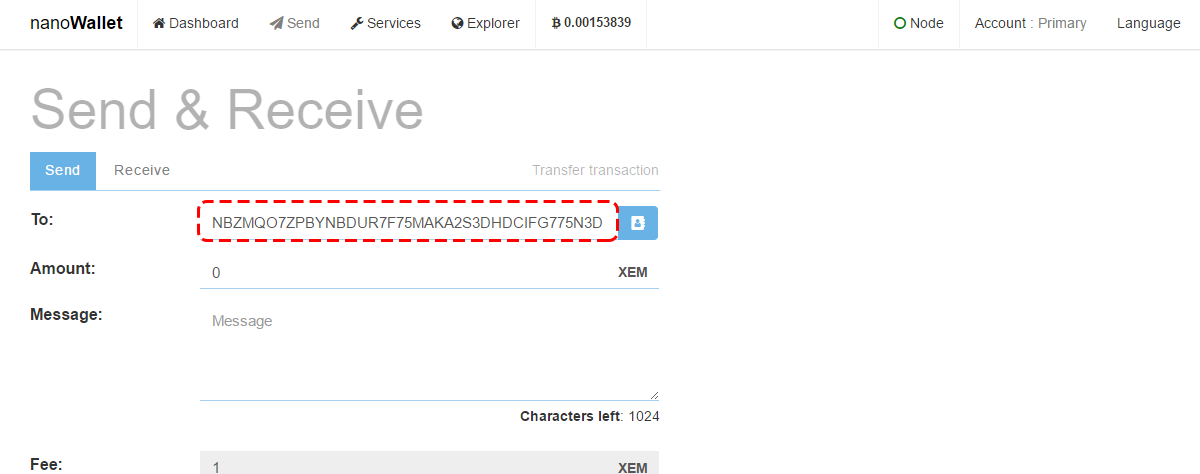
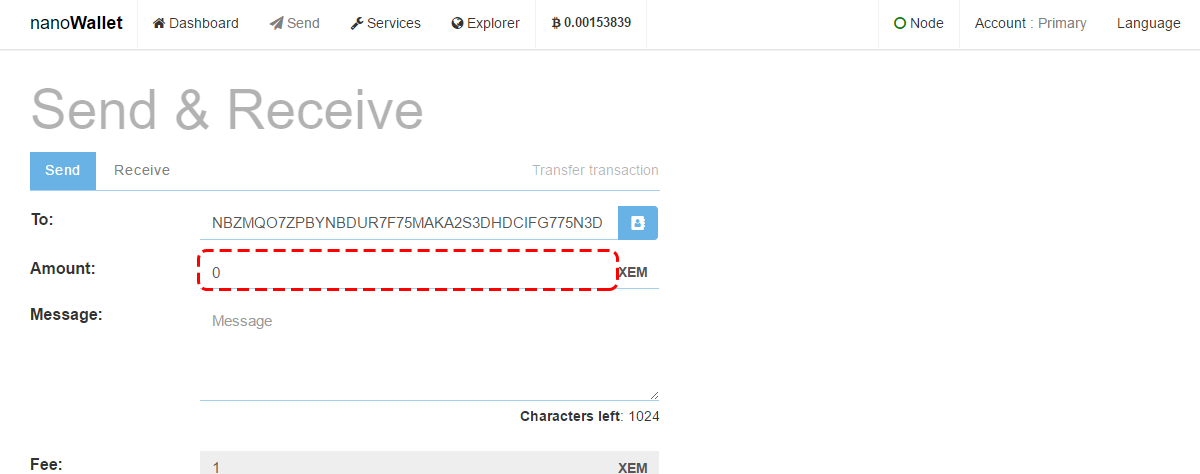
Step 3: Enter the amount
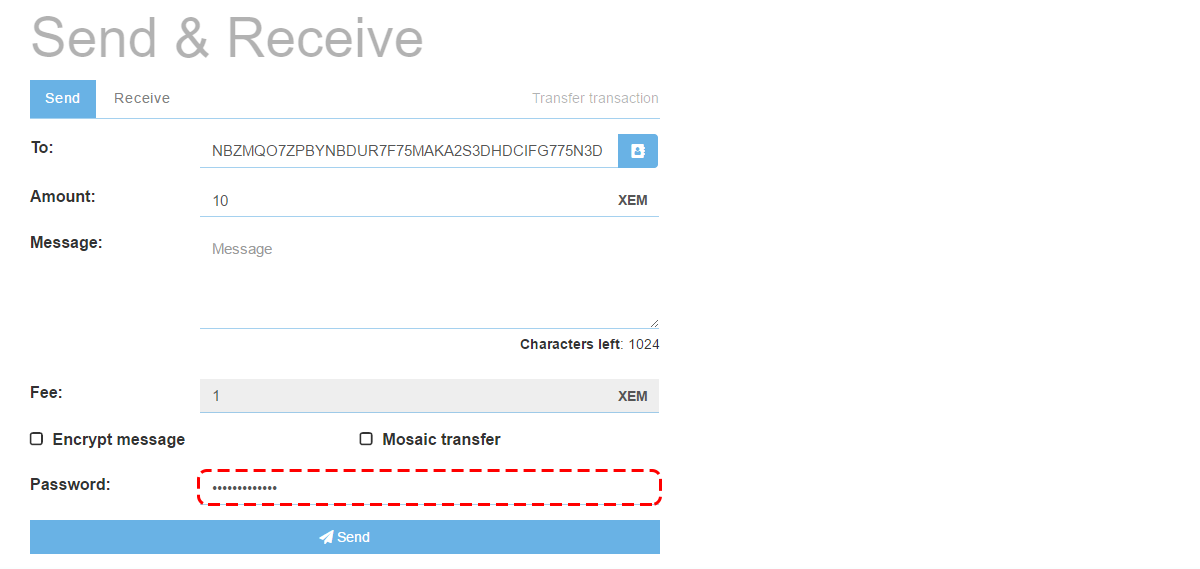
Step 4: Enter your password
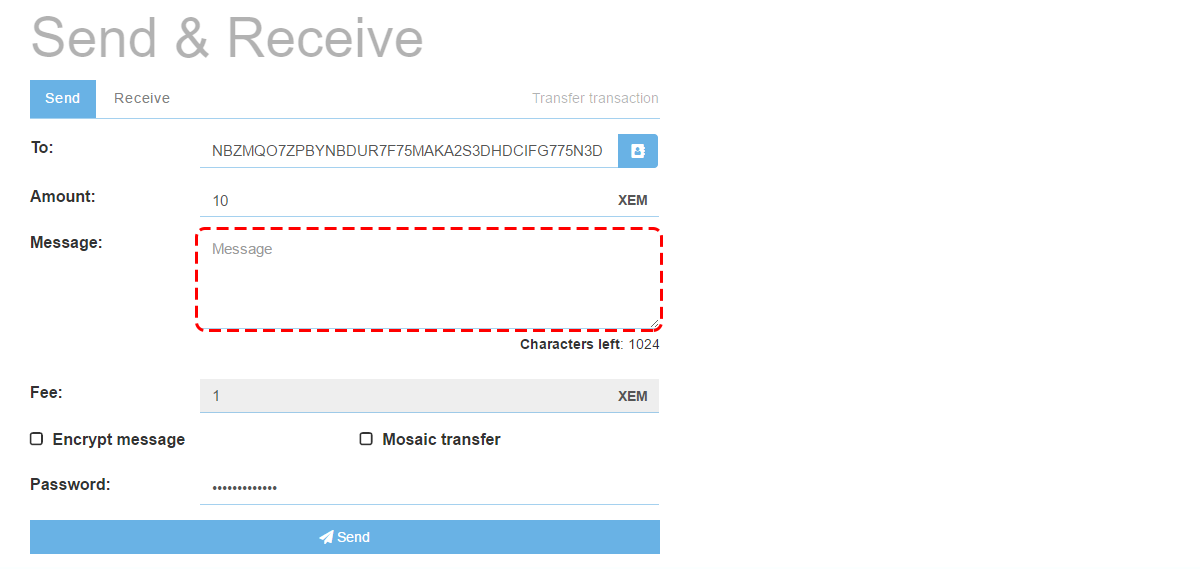
Step 5: You may need to enter a message if you’re sending to an exchange for example
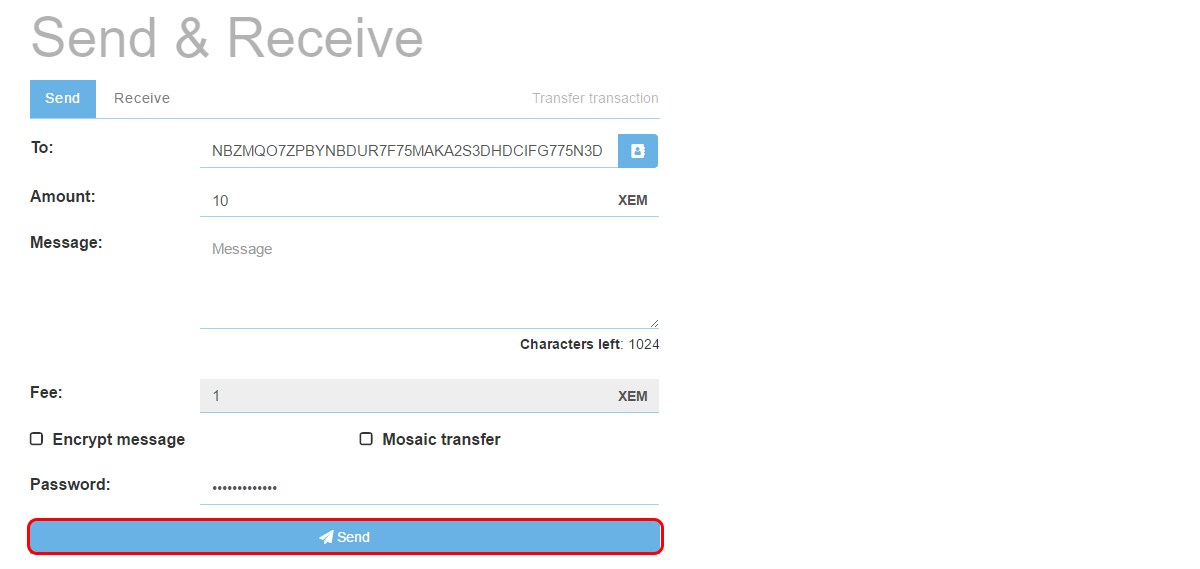
Step 6: Click “Send”
If the transaction is successful, you’ll see the following message:

That's it! You can also check the "services" tab for additional tools like Multisignature and multi-user accounts, a built-in Changelly exchange and Namespaces and Subdomains.
Important information
This website is only provided for your general information and is not intended to be relied upon by you in making any investment decisions. You should always combine multiple sources of information and analysis before making an investment and seek independent expert financial advice.
Where we list or describe different products and services, we try to give you the information you need to help you compare them and choose the right product or service for you. We may also have tips and more information to help you compare providers.
Some providers pay us for advertisements or promotions on our website or in emails we may send you. Any commercial agreement we have in place with a provider does not affect how we describe them or their products and services. Sponsored companies are clearly labelled.


 Opera
Opera
 Internet Explorer