


One of the greatest characteristics in Bitcoin is its transparency. Everything is verifiable through simple processes and information can not be forged or changed. Sometimes, however, you may be required to prove ownership of a specific wallet address or of a specific amount of Bitcoin. This is the case with some exchanges’ KYC and AML policies. This is also useful to participate in certain distribution campaigns like the Stellar and Byteball distribution campaigns.
So, how do we do this? One option is, of course, to make a pre-designated transaction from the address we want to prove ownership from. However, this is a bit wasteful and there is a better process.
It is possible to use your addresses’ private keys to prove ownership of said address. This process can be used to confirm your identity as the owner of the wallet. So let’s go through the process of signing a message with your private keys.
Part 1 - Install Electrum
If you don’t have a wallet, download Electrum. It’s a great light wallet and it will allow you to sign your message easily. You can also import your private keys to restore a wallet.
Step 1: Click here to download the Electrum wallet. Download the version that best fits your O.S
Step 2: Install the setup
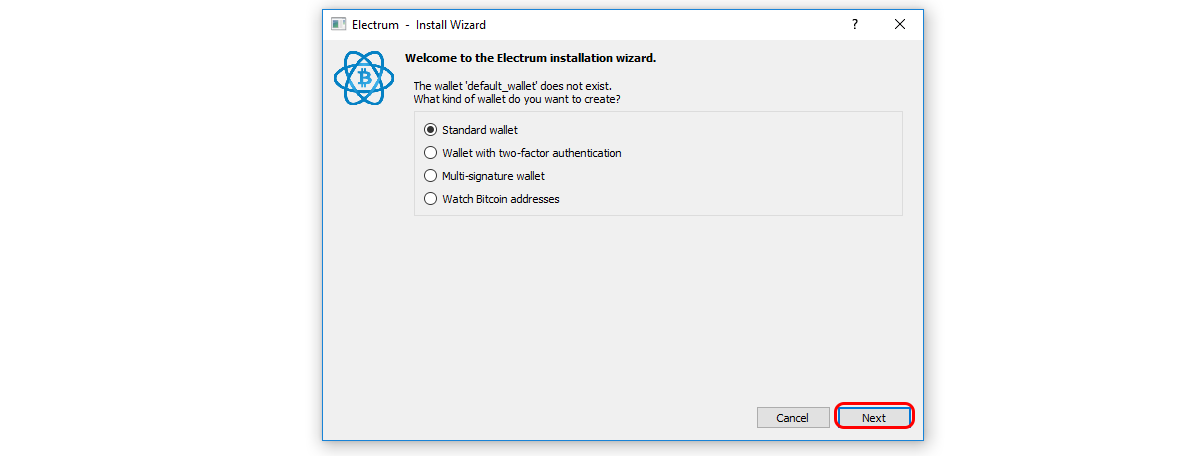
Step 3: create a new Standard wallet and click “Next”
Step 4: Choose “Create a new seed” and click “Next”
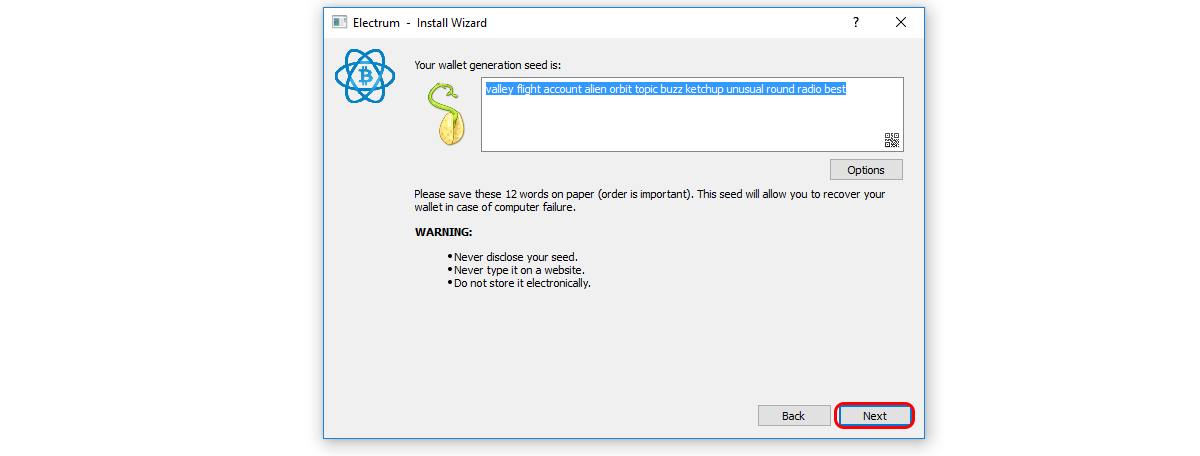
Step 5: Now that you have a seed, store it safely and click “Next”
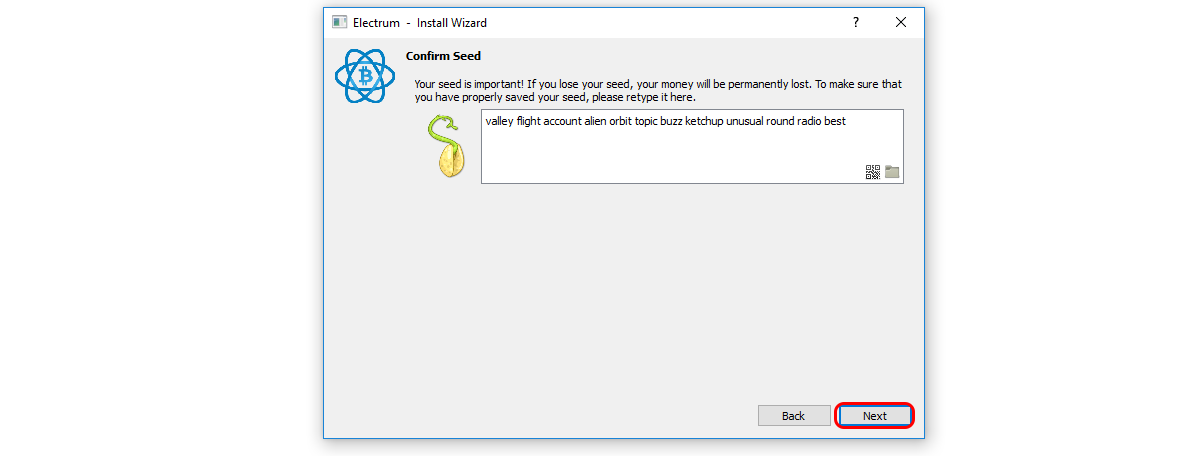
Step 6: Enter your seed and click “Next”
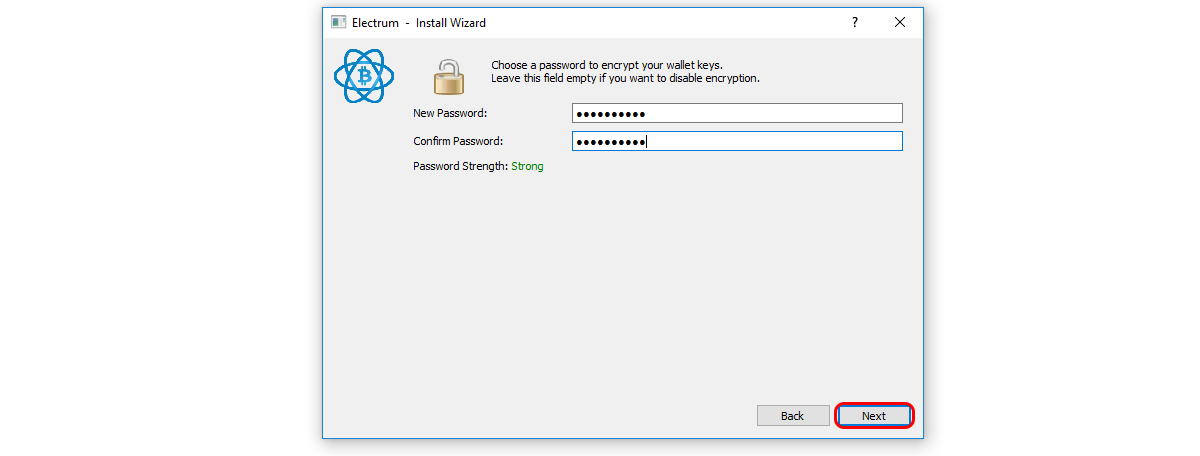
Step 7: In order to protect your wallet, you may want to add a password. Enter a strong password and click “Next”
Electrum will now create new addresses for you. In order to send btc, you'll need your password, so make sure you store it safely.
Part 2 - Sign a message Electrum
Now if you ever need to sign a message with Electrum you can do the following.
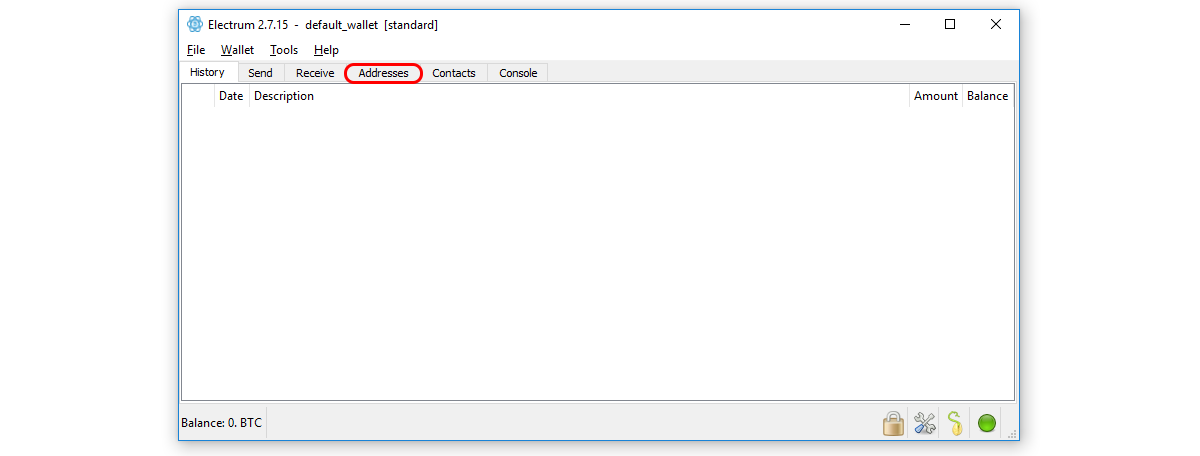
Step 1: Go to "Addresses"
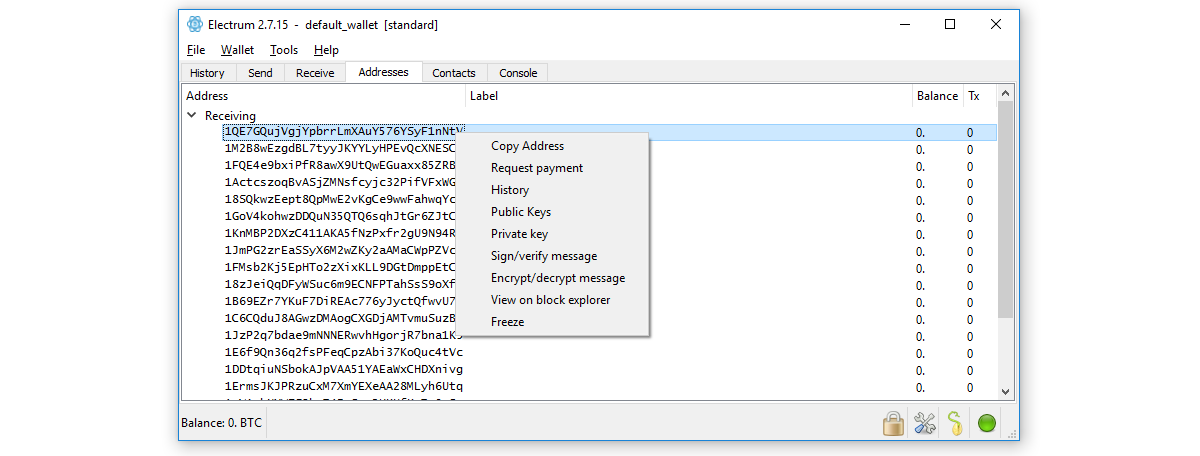
Step 2: Choose the address of which you want to prove ownership of and click it with the right mouse button
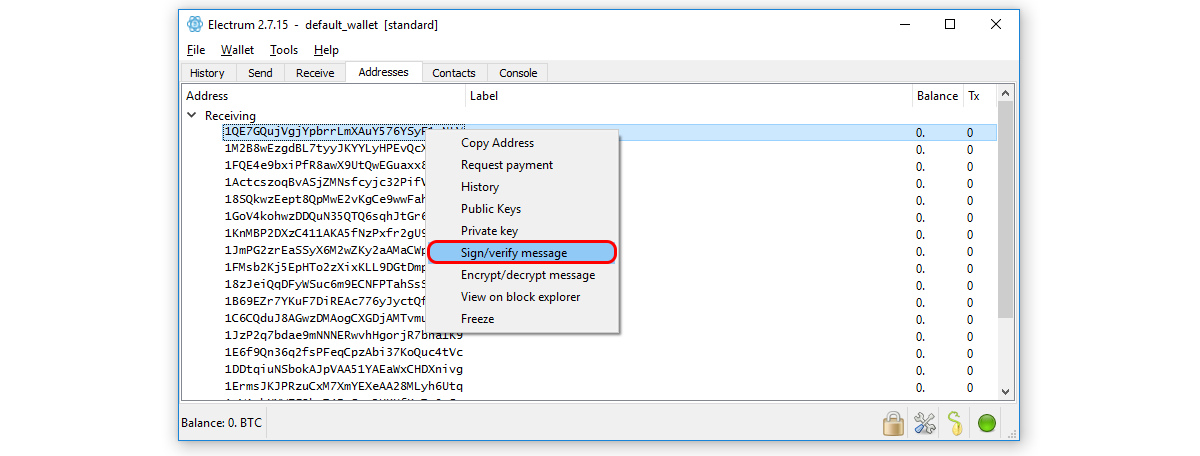
Step 3: Click “Sign/Verify Message”
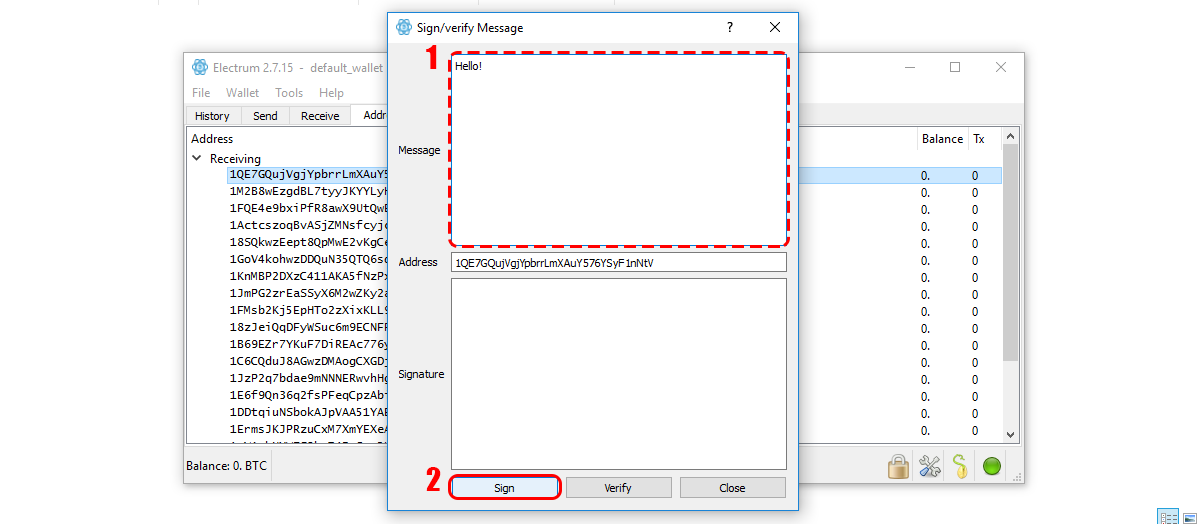
Step 4: Now enter your message in the Message field (1) and click “Sign” (2)
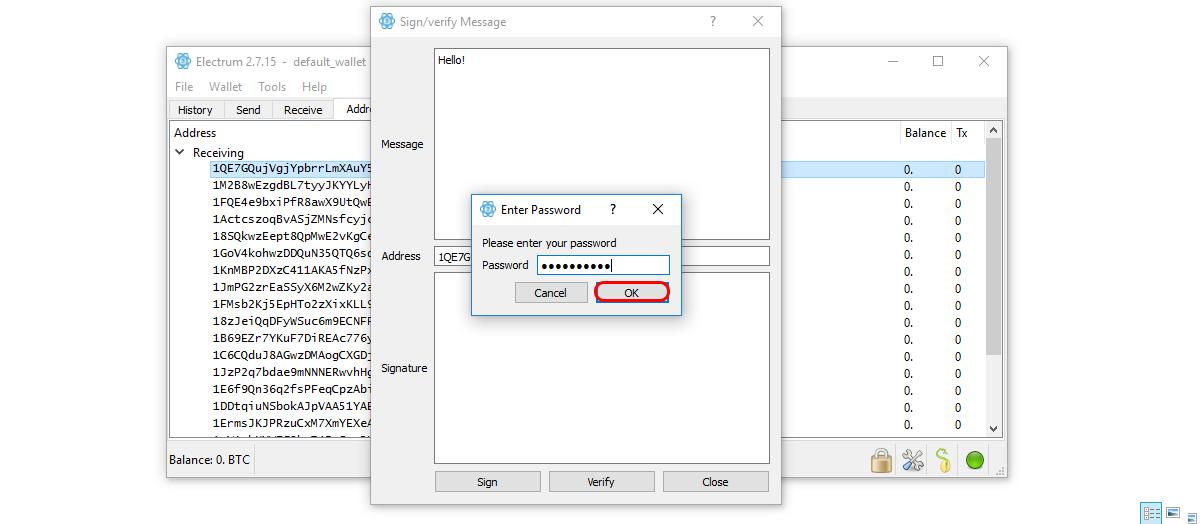
Step 5: Enter your password and click “ok”
Your signed message will be signed and displayed in the Signature field
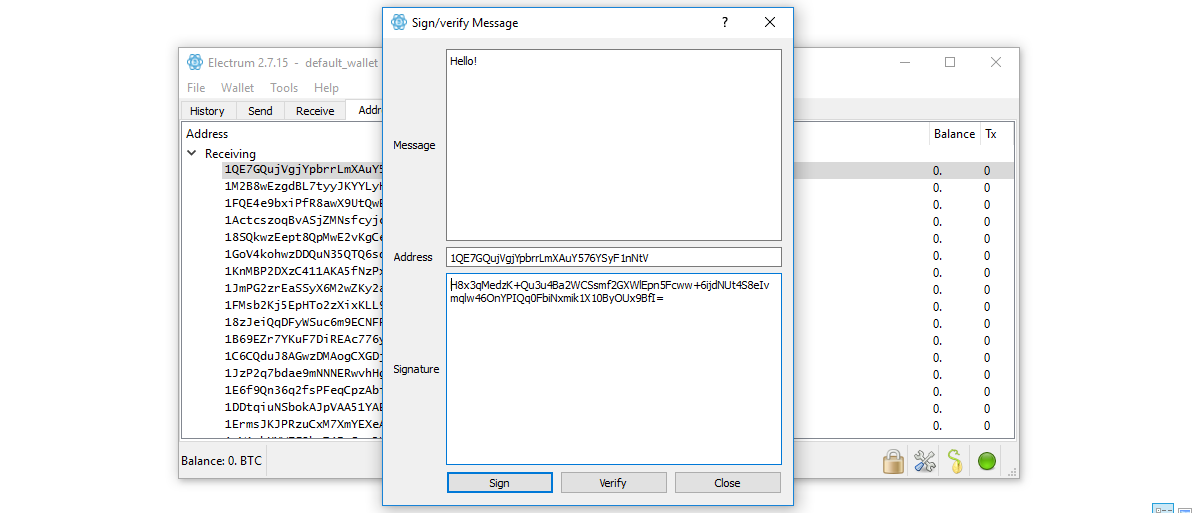
In order to send a signed message simply put the message and the signature below. As so:
Hello!
H8x3qMedzK+Qu3u4Ba2WCSsmf2GXWlEpn5Fcww+6ijdNUt4S8eIvmqlw46OnYPIQq0FbiNxmik1X10ByOUx9BfI=
Part 3 - Verify a message with Electrum
At some point, you may also need to verify if a signed message is indeed valid.
Step 1: Go to "Addresses"
Step 2: Choose any address
Step 3: Click “Sign/Verify Message”
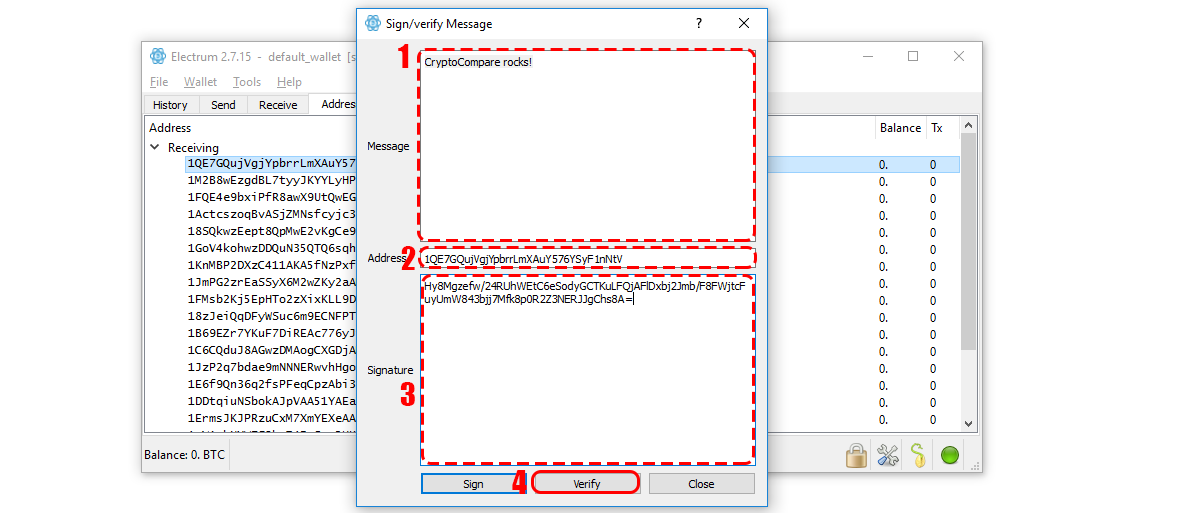
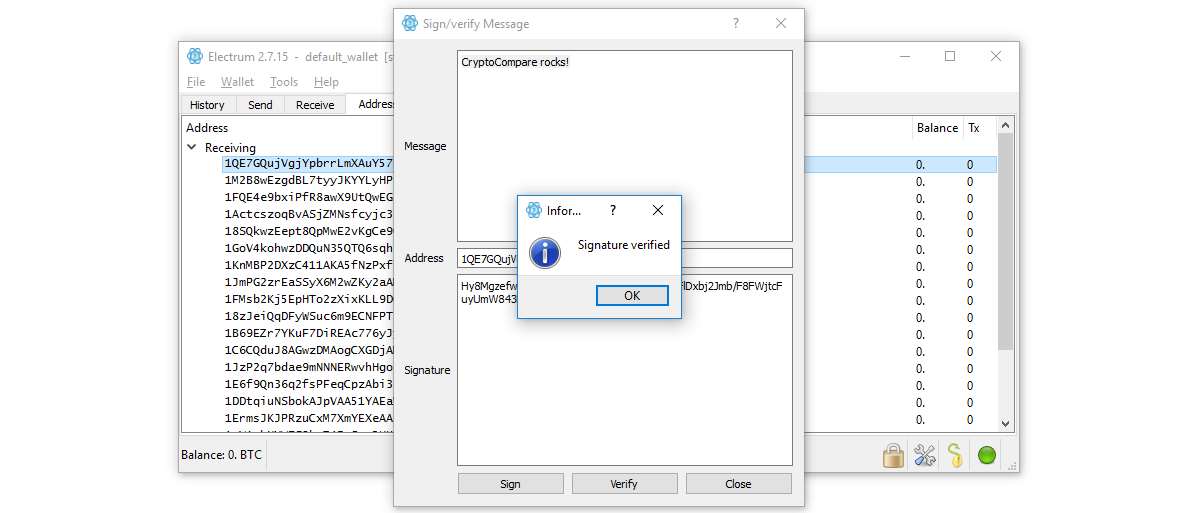
Step 4: Now enter your message you want to verify in the Message field (1). Enter the wallet address of the person that signed the message (2) and the signature in the Signature field (3). Lastly click “Verify” (4)
If the signature is valid the "Signature Verified" message will appear
If the message or signature are incorrect, it will display a "Wrong signature" message.

And that's it! You can now sign and verify messages with Electrum Bitcoin wallet! Although this is not usually required, it may prove useful in the future.
Important information
This website is only provided for your general information and is not intended to be relied upon by you in making any investment decisions. You should always combine multiple sources of information and analysis before making an investment and seek independent expert financial advice.
Where we list or describe different products and services, we try to give you the information you need to help you compare them and choose the right product or service for you. We may also have tips and more information to help you compare providers.
Some providers pay us for advertisements or promotions on our website or in emails we may send you. Any commercial agreement we have in place with a provider does not affect how we describe them or their products and services. Sponsored companies are clearly labelled.


 Opera
Opera
 Internet Explorer